
Configuration Tabs
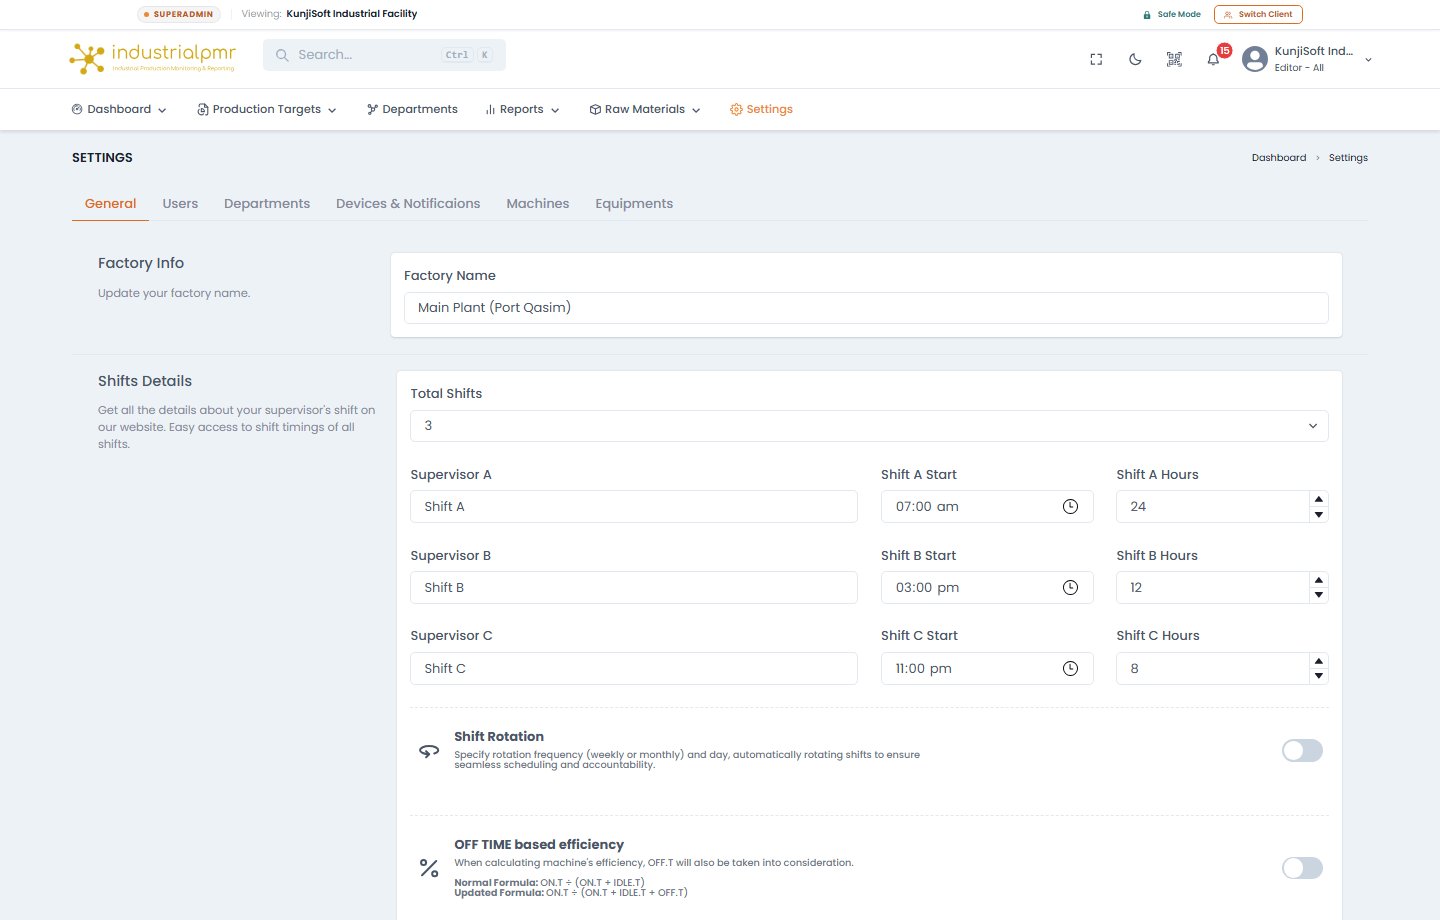
The Settings navigation organizes plant governance into six dedicated tabs:1. General Factory & Shift Configuration
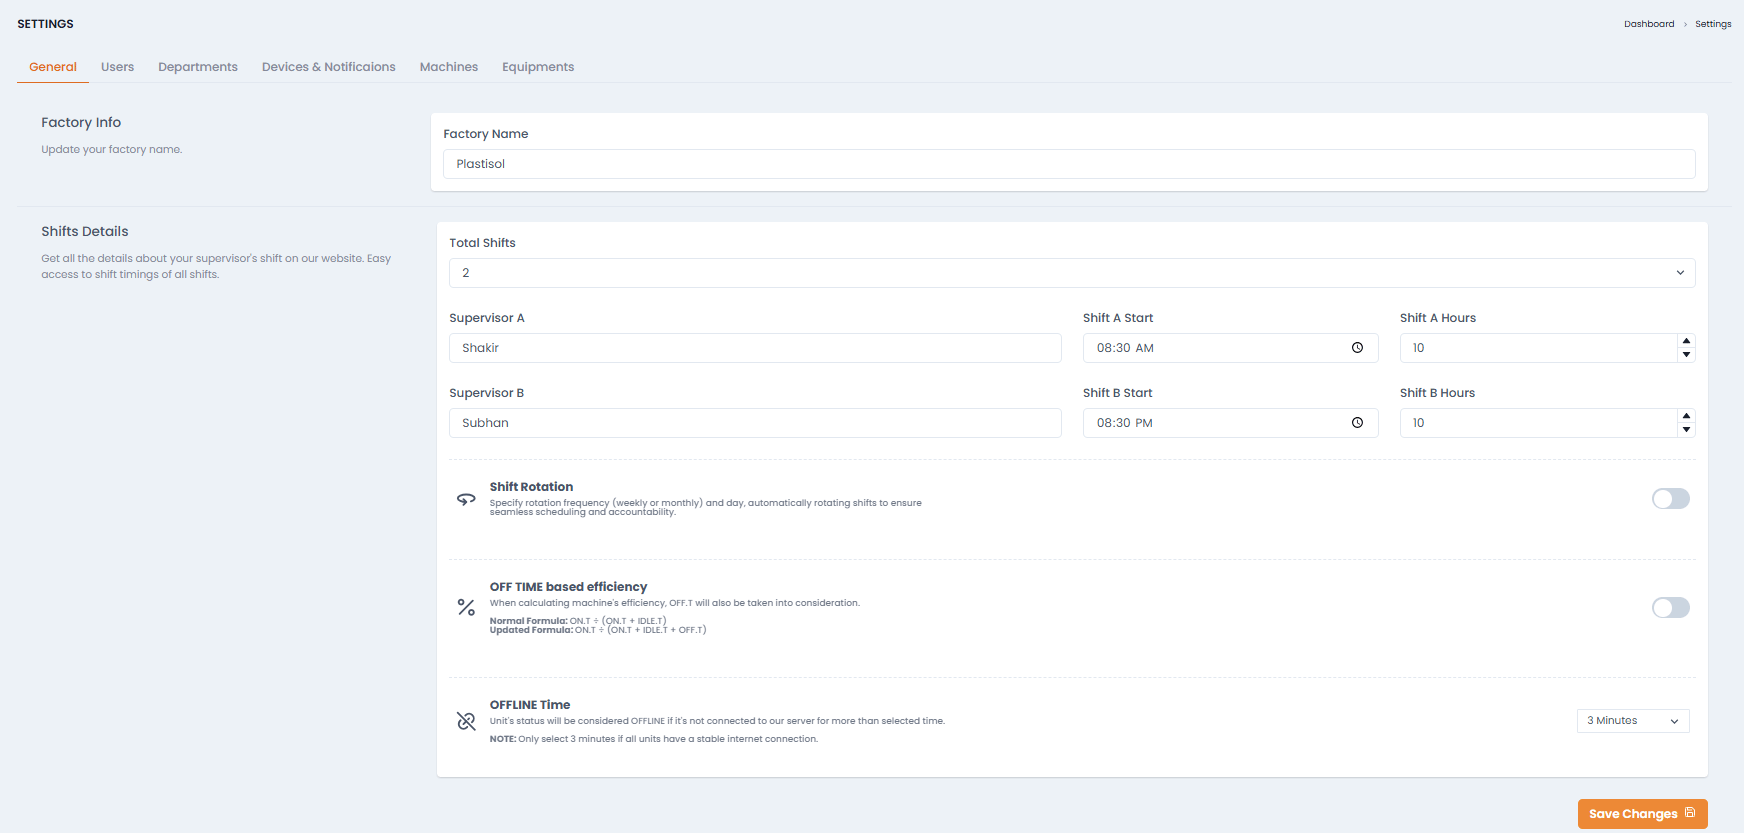
- Factory Info: Defines the plant identity (e.g.,
Plastisol Plant), physical address, and facility code. - Shift Details:
- Total Shifts: Select 1, 2, or 3 shifts per 24-hour cycle.
- Shift A Details: Supervisor in charge (e.g.,
Shakir), start time (e.g.,08:30 am), and shift length (e.g.,10 Hours). - Shift B Details: Supervisor in charge (e.g.,
Subhan), start time (e.g.,08:30 pm), and shift length (e.g.,10 Hours). - Shift C Details: Optional third shift for 24/7 continuous 8-hour shift operations.
- Shift Rotation:
Enable automatic shift rotation frequency (Weekly or Monthly) and designate the rotation day (e.g., Monday 08:00 AM) to automatically rotate supervisors and operators across shifts without manual reconfiguration.
- Frequency is Weekly or Monthly. Day is a weekday for weekly rotation, or a day of the month (1-31) for monthly rotation.
- Rotate chooses what rotates: Supervisors Only, Operators Only, or All.
- Next Rotation shows how far away the next rotation is (hover for the exact date and time), together with the supervisor each shift will have after the rotation. Rotation happens at the Shift A start time on the chosen day.
Industrial PMR automatically rolls over shift tallies at the exact designated shift boundary timestamp, generating an immutable shift report and resetting active shift dials to zero.
Efficiency Method and Offline Time
Two more switches sit at the bottom of the General tab. Remember to press Save Changes (a confirmation dialog follows).Planned downtime is also subtracted from efficiency. See Downtime Categorization.
2. Users & Access Control
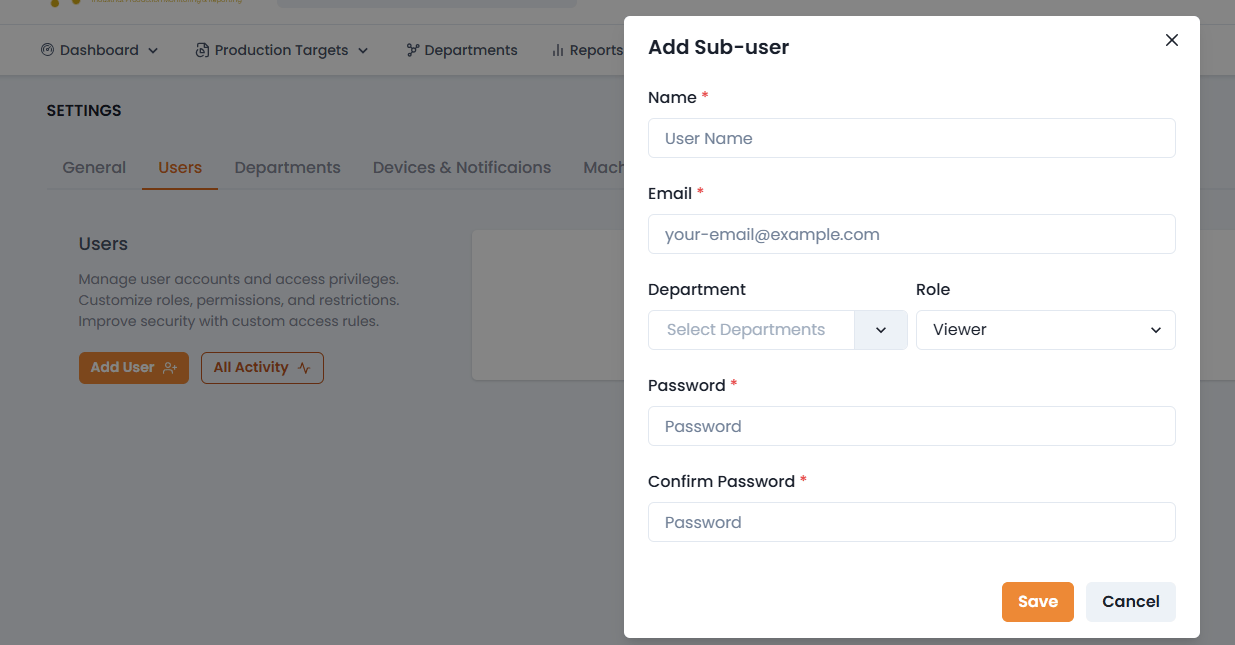
- Each user is assigned all departments or specific departments. Non-master users only see the machines and equipment in their departments.
- The account owner and master admins can also send device commands. Everyone else receives “Permission Denied”.
Activity Log
Each user has an activity log listing their actions with device details (platform and browser brand). Logged actions include:- Add, delete, or install mold
- Update info, machine, or equipment
- Add, update, or delete material
- Add, update, or delete user
- Add, update, or delete department
Adding and Editing Users
Click Add User to create a sub-user.
Each user in the list shows the last login time, role, and department. Opening a user (Edit) offers:
- Name, Department, and Role changes.
- Account Status: disable a user without deleting them.
- Password Action → Reset Password: sends a password reset email to the user.
- Delete User: permanent, after a confirmation.
3. Departments Management
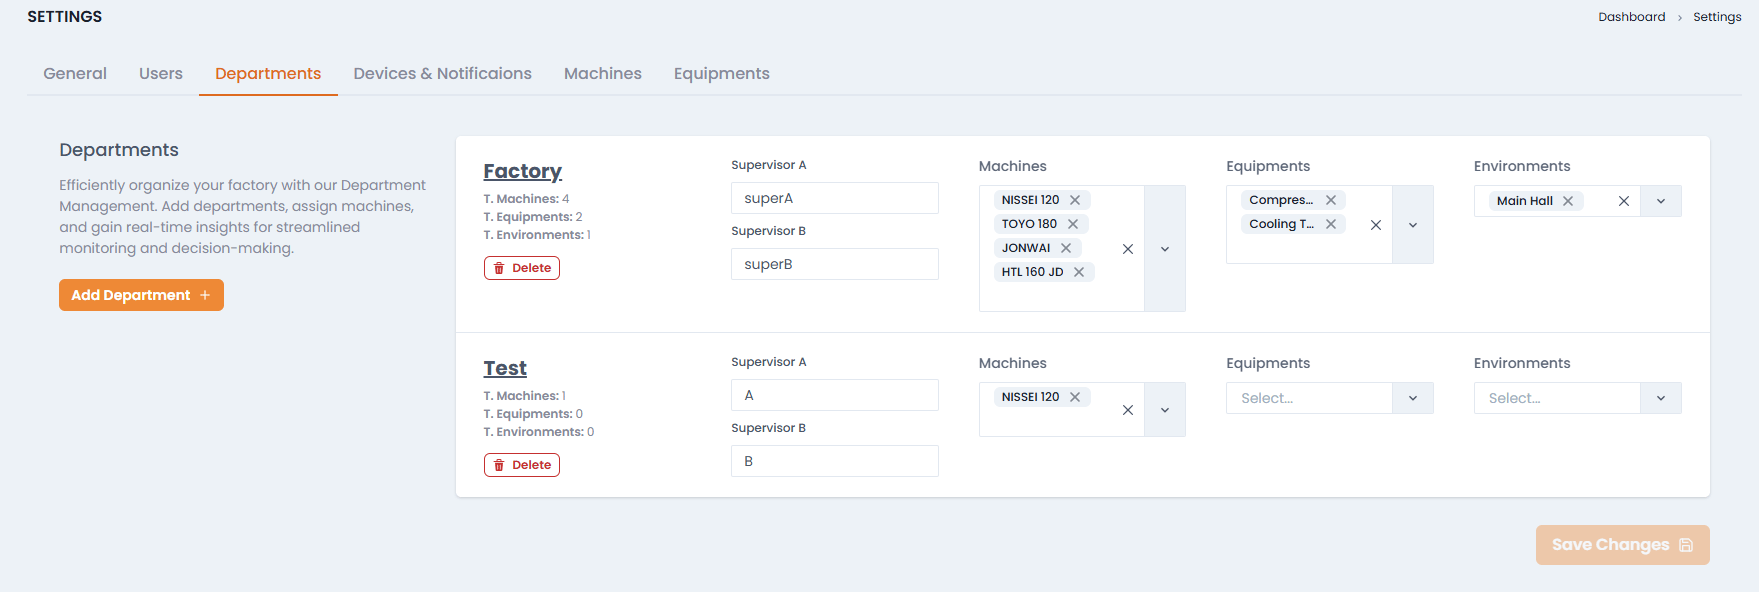
- Create physical or operational departments (e.g., Injection Molding Hall, Stamping & Sheet Metal, Paint & Finishing, Final Assembly).
- Designate the department lead and allocate machines dynamically as factory floor layouts change.
- Department names must be unique.
- Departments are what non-master users are restricted to. See Roles and Visibility.
The Users and Departments tabs can only be managed by the account owner. Other users who open these tabs see Unauthorized access.
4. Devices & Notifications
- Hardware Node MAC Binding: Map physical hardware MAC addresses (e.g.,
24:6F:28:XX:XX:XX) to logical factory unit identifiers (UNIT#01,UNIT#02). - Alert Rules & Channels:
- Phase Imbalance Alert: Triggered when phase current deviation exceeds 15%.
- Prolonged Idle Alert: Alerts supervisors when a machine remains idle beyond normal changeover tolerances (e.g., > 20 minutes).
- Offline Watchdog: Dispatches immediate notifications when an edge node ceases MQTT heartbeats for > 60 seconds.
- Dispatch Channels: In-app popover toasts, mobile push notifications, and automated SMS alerts.
5. Machines Configuration
- Machine Name & Model: e.g.,
NISSEI 120,TOYO 180,JONWAI,HTL 160 JD. - Tonnage / Capacity: Clamping force rating in metric tons.
- Rated Electrical Capacity: Motor and barrel heater power in kilowatts (kW).
- Pulse Multiplier & Sensor Pin: Set the pulse ratio (e.g., 1 pulse = 1 cycle, or pulse per linear meter).
- Idle Current Threshold: Threshold current (Amperes) above which the machine is recognized as energized.
- Idle Timeout Seconds: Grace period before a stationary energized machine transitions from RUNNING to IDLE.
- Molds & Tooling Library: Register tooling profiles with cavity counts, cycle time baselines, and part shot weights.
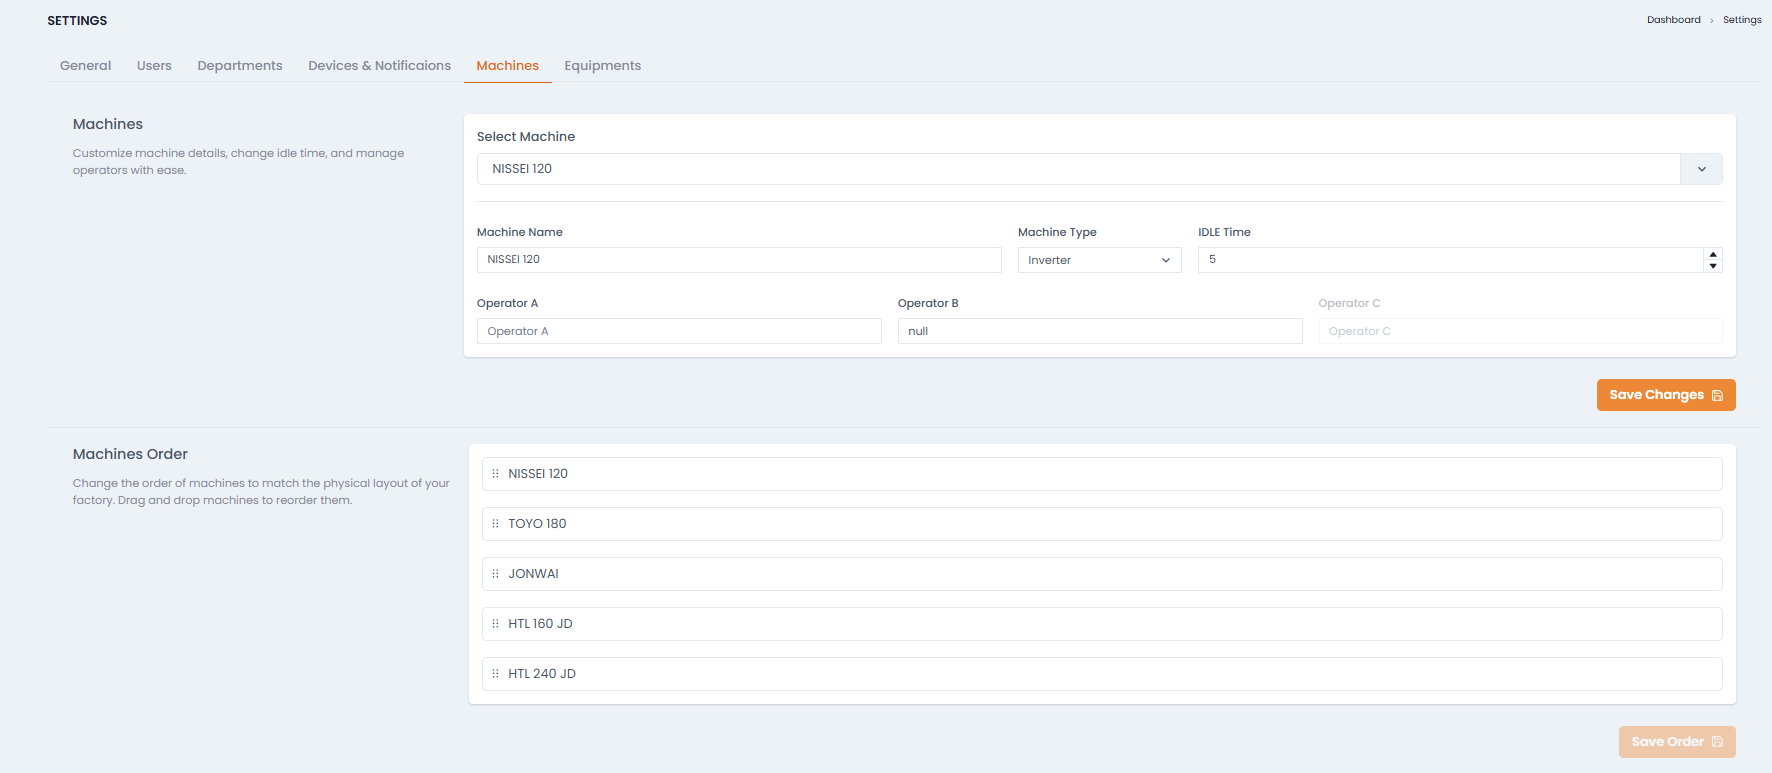
In the dashboard, the Machines tab lets you edit:
Machines Order lets you drag and drop machines into the order that matches the physical layout of your factory, then press Save Order. Changing a machine requires the account owner, an Editor, or a master admin; others receive Permission Denied.
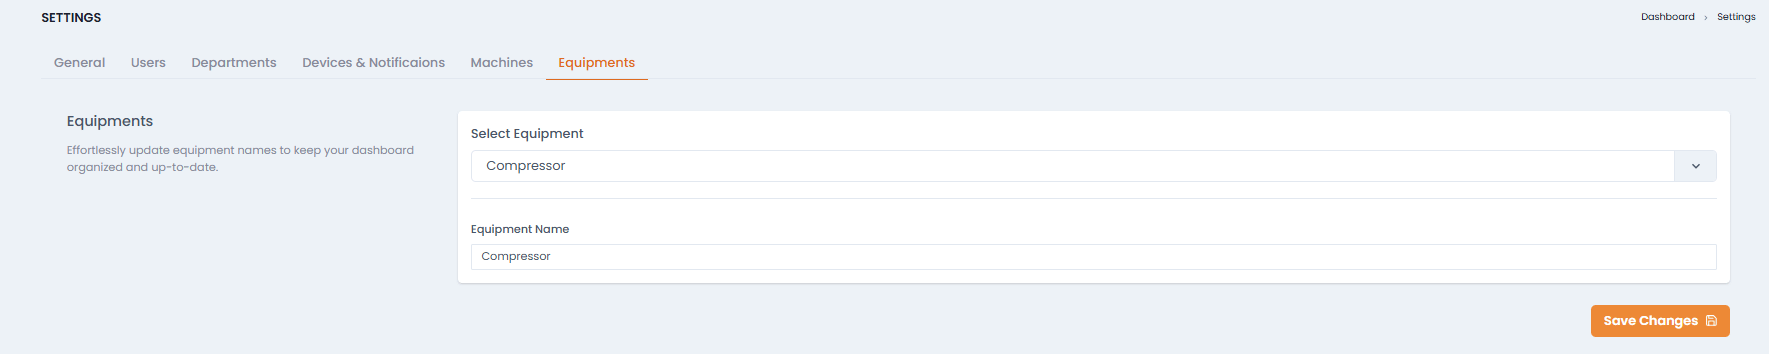
6. Equipments Configuration
- Central Air Compressors
- Industrial Water Chillers & Cooling Towers
- Resin Dehumidifiers & Hopper Dryers
- Regrind Granulators
- Input rated power (kW) and current sensor bindings to incorporate auxiliary baseload into the plant’s overall energy footprint.
In the dashboard, the Equipments tab lets you select an equipment and rename it (Equipment Name, then Save Changes). If no equipment exists yet, the tab shows No Equipments Found.
Devices & Notifications: Preferences, Devices and Categories
Notification Preferences
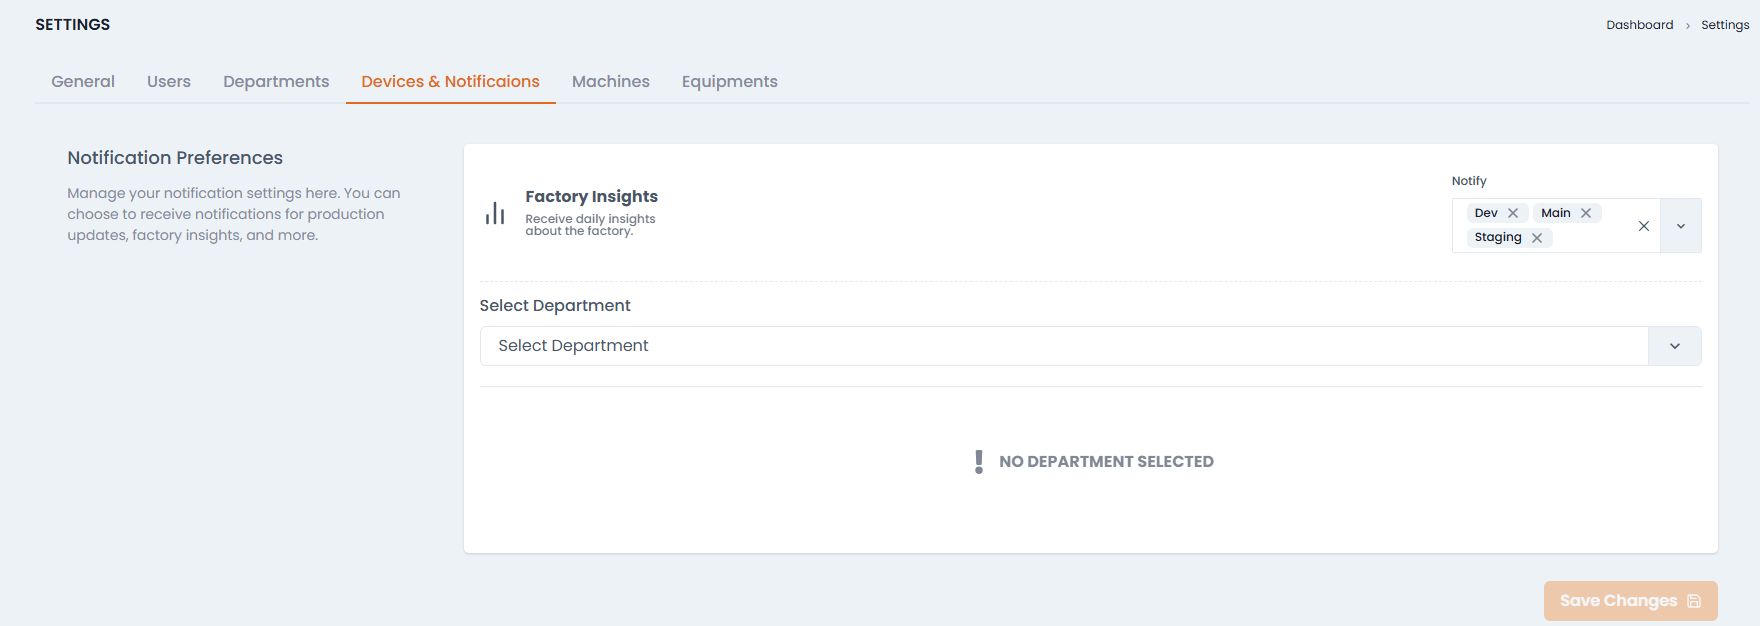
Each preference is delivered to the device categories you choose in its Notify field (see Device Categories below).
Use Select Department to pick a department, then choose the categories to notify for each of the three department preferences. Press Save Changes to apply.
Registered Devices
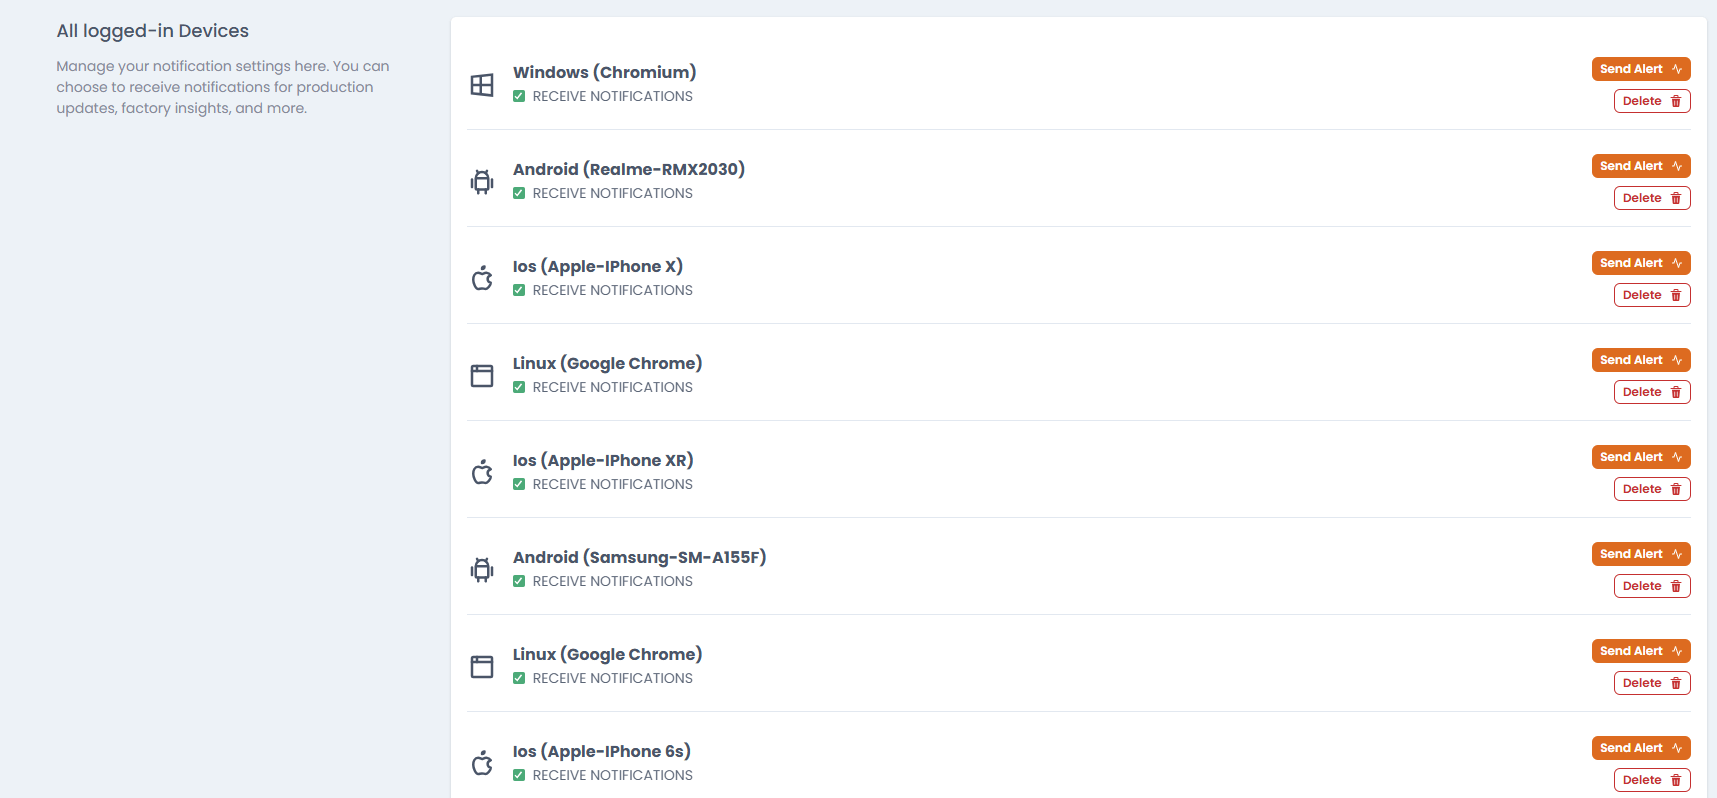
Each registered device shows its platform, model, and status.- The All logged-in Devices list shows every device that has signed in, with an icon for Android, iOS, or Windows. The current device is highlighted.
- The Receive Notifications checkbox turns notifications on or off for one device, after a confirmation.
- Send Alert sends a test notification to that device, after a confirmation.
- Removing a device deletes its token, so it no longer receives any notifications.
Device Categories
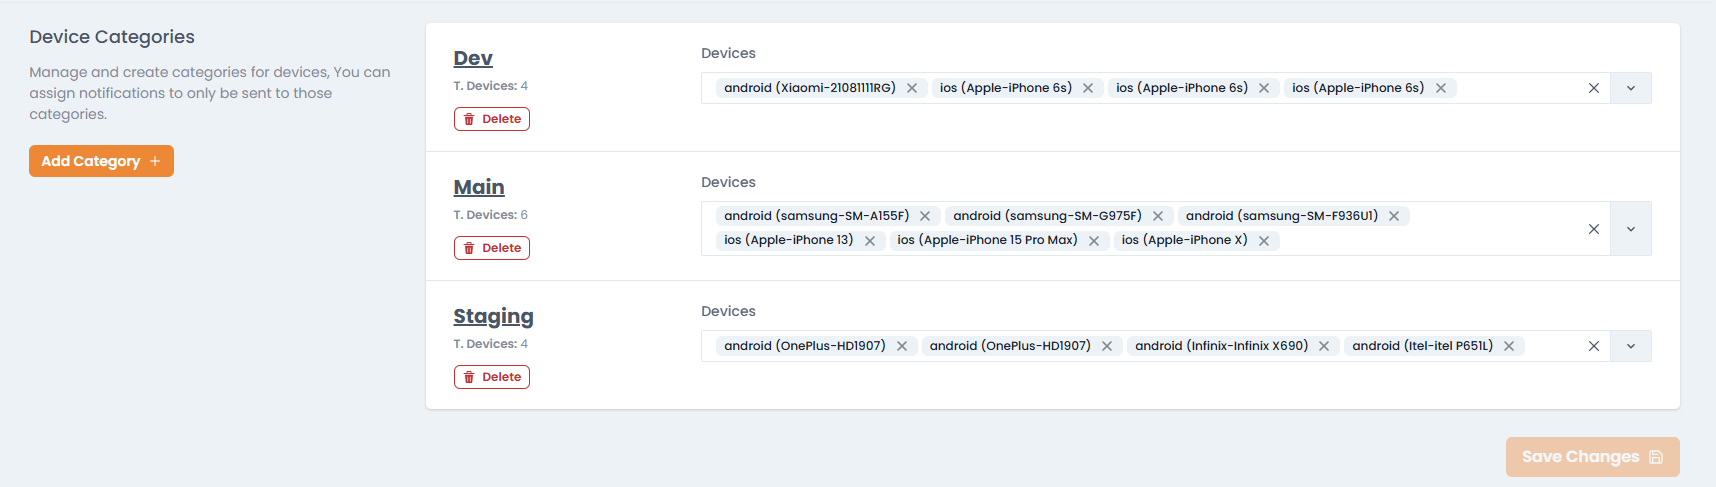
Device categories group devices so that targets, thermocouple alerts, and other alerts can notify a chosen group.- Add category needs a unique name and at least one device.
- Push notifications are delivered to the registered device tokens.
- Each category in the list shows its total devices (T. Devices). You can change its devices and press Save Changes, or Delete the category.
Categories are chosen in the Notify field of a production target and in the thermocouple settings.
Related Machine Configuration
- Per-machine power alert thresholds are configured on the Machine Power page.
- Molds are added, installed, and edited in the Molds Manager.